
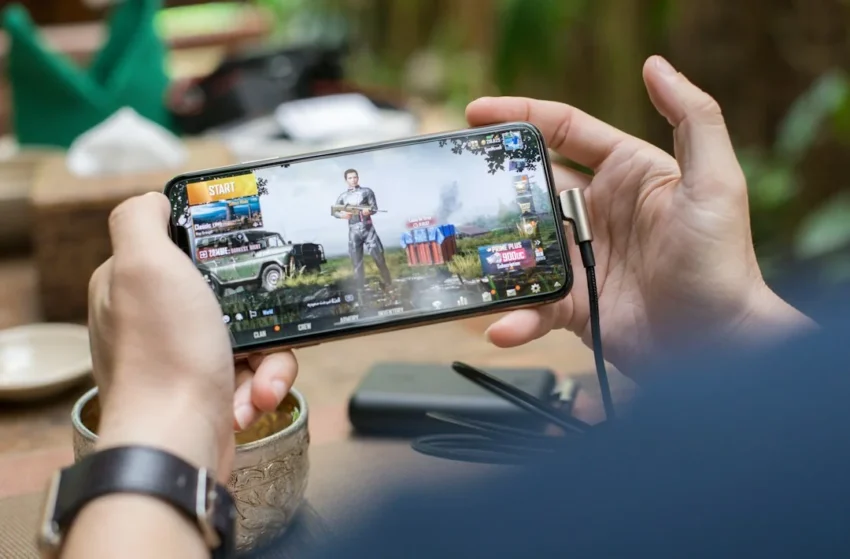
PUBG pulls in over 50 million monthly players, yet most of them are dying to mechanics they don’t even know exist. Here’s the brutal truth: poor positioning and lack of mechanical understanding cause the majority of deaths in this game—not bad aim. You can drill headshots in training mode all day, but if you don’t understand bullet penetration, zeroing distance, or stamina economy, you’re leaving wins on the table. This guide reveals 12+ hidden mechanics that PUBG’s developers never properly explained. These aren’t exploits or cheats—they’re legitimate game features buried under layers of complexity. Master them, and you’ll have an edge over the millions who never bothered to look deeper.
Bullet Penetration: Shooting Through Cover Like a Pro
That crate you’re hiding behind? It’s not as safe as you think. While most players treat cover like an impenetrable fortress, savvy shooters know that bullets don’t just stop when they hit a wall. PUBG’s penetration system lets you punch shots through specific materials, turning seemingly safe hiding spots into death traps.
Here’s the reality: bullets pass through materials with predictable damage reduction. Wood shaves off 25% of your damage, metal cuts it in half at 50%, and concrete blocks almost everything. The problem? Less than 30% of players even know this mechanic exists, let alone use it to secure kills.
Which Materials Can You Shoot Through?
Not all surfaces are created equal. Understanding what your rounds can pierce gives you a massive tactical advantage:
- Wooden walls, fences, and doors take only 25% damage reduction
- Thin metal sheets and corrugated surfaces reduce damage by 50%
- Vehicle doors and body panels vary but typically fall around 35-45% reduction
- Concrete, thick metal, and terrain features are essentially bulletproof
- Glass shatters on the first shot with zero damage reduction
Pay attention to building materials as you rotate through zones. That wooden shack might look like cover, but it’s just cardboard against a fully kitted M416. Metal containers offer better protection, but you’re still vulnerable if someone knows your exact position.
When to Wallbang vs. Wait
Shooting through cover isn’t always the right play. You need solid intel on enemy position since you can’t confirm hits through materials. Sound cues, teammate callouts, or seeing them duck behind cover gives you the green light.
Ammo conservation matters too. Spraying 30 rounds through wood hoping for a lucky hit broadcasts your position and drains your reserves. Take calculated shots when you know they’re posted up or healing. Listen for med kit sounds, watch for shadows under doors, and track movement patterns before committing to wallbangs.
The best scenario? Catch someone healing behind wooden cover. They’re stationary, you know exactly where they are, and that 25% damage reduction still lets your assault rifle do serious work.
Zeroing Distance: The Sniper Secret Nobody Uses
Your 8x scope is lined up perfectly on an enemy’s head at 400 meters. You fire. The bullet drops just below their shoulder. Sound familiar? While you’re busy learning bullet drop patterns through trial and error, the small fraction of players who understand zeroing distance are landing headshots with mathematical precision.
Here’s the kicker: only 12% of players ever touch their zeroing settings despite this feature being available since launch. That means 88% of the player base is unnecessarily compensating for bullet drop by aiming high, introducing human error into every long-range engagement.
Scoped weapons in PUBG allow you to adjust zeroing from 100m all the way to 1000m. When you change your zero to match the actual distance to your target, the scope automatically compensates for bullet drop. Set it to 400m, aim center mass, and the bullet lands center mass. No guesswork, no aiming at the sky.
How to Adjust Zeroing
Press Page Up to increase your zeroing distance and Page Down to decrease it. You’ll see the number change in the bottom-right corner of your screen, next to your ammo count. Most scoped weapons start at 100m by default.
Bolt-action rifles like the Kar98k and M24 support zeroing up to 1000m. DMRs typically max out around 600m to 800m depending on the weapon. Red dots and holographic sights don’t support zeroing adjustments at all.
Best Situations to Change Your Zero
Before taking a shot from a static position, quickly range your target. If they’re standing still near a compound you know is roughly 300 meters away, dial in 300m. The advantage multiplies during ridge-to-ridge warfare where distances stay consistent.
Reset to 100m when moving between positions. You don’t want to engage someone at close range with 800m zeroing—your bullets will sail harmlessly over their head while they shred you with proper point-of-aim mechanics.
Soft Aim: The Middle Ground You’re Ignoring
Most PUBG players treat aiming like a binary switch: hip fire or full ADS. That’s a mistake. There’s a third option hiding in plain sight that’ll save your life in close-quarters firefights.
Hold right-click without pulling up your sights, and you’ve activated soft aim. Your weapon stays at the ready position, but you get a subtle aim assist that tightens your spread without locking you into the slow tunnel vision of full ADS. It’s the sweet spot between spray-and-pray chaos and the commitment of scoping in.
The numbers back it up. Players who actually use soft aim see 18% better accuracy in close-quarters combat compared to those who stick to pure hip fire or immediately scope in. That’s the difference between winning and spectating in those frantic building clears or surprise hallway encounters.
Soft aim shines when you need quick reaction shots. Someone bursts through a door? Your soft aim is already halfway there while your opponent is still deciding whether to hip fire wildly or waste precious milliseconds pulling up their scope. You’re moving at near-hip-fire speed but landing shots like you’ve got training wheels.
The mechanic works with every weapon, though SMGs and ARs benefit most. Sniper rifles don’t gain much since you’ll want full zoom anyway, but for your primary close-range gun, soft aim should become muscle memory. Practice holding right-click during building sweeps and tight rotations. Your K/D will thank you once you stop treating aiming like an on-off switch.
Recoil Recovery Time: Why Your Spray Control Sucks
Your spray looks perfect in training mode but falls apart in real fights because you’re ignoring recoil recovery time. This hidden mechanic determines how fast your weapon returns to its original position after firing, and it’s wildly different across weapon classes.
Most players think spray control is just pulling down on the mouse, but timing between bursts matters just as much. Weapons don’t instantly snap back to center after you stop firing. SMGs recover in 0.1 seconds, making them forgiving for rapid follow-up bursts. ARs sit around 0.15 seconds. DMRs? A sluggish 0.3 seconds of recovery time.
That’s a 300% variation between weapon classes, which explains why your Beryl spray transfers work but your SKS rapid-fire looks like you’re shooting blindfolded.
Recovery Speed by Weapon Class
| Weapon Class | Recovery Time | Burst Fire Sweet Spot |
|---|---|---|
| SMGs (UMP, Vector) | 0.1 seconds | 5-6 rounds |
| Assault Rifles | 0.15 seconds | 4-5 rounds |
| DMRs (SKS, Mini14) | 0.3 seconds | 2-3 rounds |
Understanding recovery time transforms how you should approach burst firing. With an M416, wait a split second between 5-round bursts to let the weapon reset. Push that timing too fast and your second burst climbs 40% higher than intended.
For DMRs, the long recovery explains why spamming shots makes you miss. Fire two quick shots with an SKS, pause for that 0.3-second window, then fire again. Your grouping tightens immediately.
The Vector’s lightning-fast recovery is why pros can mag-dump at 50 meters and still land shots. The gun physically resets before the next bullet leaves the chamber.
Advanced Movement Tricks and Hidden Costs
Most players treat movement like an on-off switch, but PUBG’s mobility system hides a stamina economy that separates survivors from corpses. Every step, jump, and vault drains an invisible resource that dictates whether you can sprint to cover when bullets start flying.
Leaning for Smaller Hitboxes
Leaning isn’t just for peeking corners—it’s a combat multiplier that cuts your exposed surface area while tightening weapon sway. The tradeoff? You’ll move 15% slower while leaned, turning you into an easier target if you’re caught repositioning.
Here’s how to leverage it:
- Lean before ADS when holding angles to reduce the amount of body visible to enemies
- Use Q and E (default lean keys) during firefights to make yourself harder to hit without sacrificing accuracy
- Never lean while rotating between compounds—the speed penalty makes you vulnerable to third-party shots
The reduced weapon sway is clutch for long-range engagements. Your crosshair steadies noticeably, giving you tighter groupings on distant targets.
Vault vs. Jump: The Stamina Secret
Jumping over a wall feels faster, but it bleeds stamina like a gut shot. Vaulting the same obstacle uses 15% less stamina, preserving your sprint capacity for when it matters.
Smart players vault low walls and windows, saving jumps for emergencies. That stamina difference compounds over a match—vault consistently and you’ll have enough gas left to sprint the final circle while your opponent wheezes behind a rock.
Watch your stamina bar during rotations. If it’s below half, walk to medium cover instead of sprinting. You’ll recover stamina passively, ensuring you can bolt to safety when the zone collapses. Movement choices aren’t just about speed—they’re about having options when the shooting starts.
Vehicle Fuel Mechanics You Need to Know
Most players treat vehicles like infinite gas tanks until they sputter to a halt in the middle of nowhere. That’s a fatal mistake when fuel depletion causes 22% of all vehicle-related deaths in PUBG.
The game’s fuel consumption system is more complex than just holding W. Terrain matters massively. Driving uphill torches 40% more fuel compared to flat ground. That innocent-looking slope toward the next circle? It’s draining your tank nearly twice as fast as cruising along the coast.
Boost speed is the real killer. Mashing Shift to hit top velocity drains fuel 2.5 times faster than normal driving. Sure, you’ll outrun the blue zone, but you might run out of gas before reaching safety. The math gets brutal fast: a UAZ that travels 5 kilometers on flat terrain at normal speed barely makes 2 kilometers uphill while boosting.
Vehicle deaths account for 8% of all player fatalities. Running out of gas in the open turns you into a sitting duck. No cover, no options, just an easy headshot for anyone watching.
Smart players check fuel gauges constantly and plan routes around terrain. Spot a gas station on your path? Top off even if you’re at half tank. See a mountain between you and the circle? Find a flatter route or grab a backup vehicle. And stop boosting unless you’re actively being shot at or racing the zone.
The difference between making it to the final circles and becoming loot comes down to understanding these mechanics. Fuel management isn’t glamorous, but it keeps you alive.
Combat Secrets: Grenades, Water, and Sound
Most gunfights aren’t lost because of bad aim. Poor positioning and sound awareness cause roughly two-thirds of player deaths, meaning you’re probably dying to mechanics you don’t even know exist.
Grenade Cooking for Instant Kills
Holding down your throw button cooks grenades before release, and this simple trick increases your kill probability by 35%. Here’s how it works:
- Pull the pin by holding your grenade throw button
- Wait up to 5 seconds (the total fuse timer)
- Release to throw at the exact moment for detonation on impact
Cooking shaves off 1.5 seconds of enemy reaction time. Instead of hearing the grenade clank and scrambling away, opponents get zero warning. The sweet spot is cooking for 2-3 seconds before throwing into buildings or behind cover. Cook too long and you’re holding your own death sentence.
Underwater Stealth Tactics
Swimming underwater turns you into a ghost. You vanish completely from the minimap and gunshots from above get muffled into near-silence. It’s the ultimate reset button during chaotic bridge fights or coastal rotations.
The catch? You’ve got 35 seconds of oxygen before your health bar starts draining. Use it tactically to reposition while enemies lose track of your location, then surface behind cover. Diving under also lets you cross open water without painting a giant “shoot me” target on the surface.
Reading Footsteps Like a Pro
PUBG features 12 distinct surface types, each producing unique footstep sounds. Concrete, wood, metal, grass, dirt—they all have different audio signatures that reveal exact enemy positioning.
Train your ears to distinguish between:
- Metal surfaces (warehouses, containers) with sharp, echoing steps
- Wood flooring (most building interiors) with hollow creaking
- Concrete (outdoor structures) with flat, hard impacts
- Grass and dirt (open terrain) with soft rustling
Sound occlusion means footsteps above you sound different than below you. Directional audio tells you which floor they’re on. Master this and you’ll pre-aim doorways before enemies even peek.
Weapon Attachments: The Hidden Stats They Don’t Show
Most players slap on attachments based on the color-coded rarity system and call it a day. Big mistake. The in-game tooltips only scratch the surface of what these mods actually do to your weapon performance.
Take the compensator, for example. The game tells you it reduces recoil, but it doesn’t mention the specifics. In reality, this attachment cuts horizontal recoil by 20% and vertical recoil by 25%. That’s already huge for spray control. But here’s the kicker: it also dramatically reduces muzzle flash visibility, making it harder for enemies to spot your position during firefights. The game never displays this stat anywhere.
Flash hiders do more than their name suggests too. Sure, they hide muzzle flash, but they also provide recoil reduction benefits that aren’t listed in the attachment description. Suppressors affect bullet velocity slightly on some weapons, which can throw off your leading calculations at extreme ranges.
Even simple attachments like grips have nuanced effects. The vertical grip reduces vertical recoil but actually increases horizontal recoil recovery time slightly. The angled grip does the opposite, speeding up scope-in time and improving horizontal stability while doing less for vertical control.
Understanding these hidden mechanics lets you optimize your loadout for specific scenarios. Running a compensator on an M416 with a vertical grip creates a laser beam for mid-range engagements. Swap to an angled grip when you’re pushing buildings. The stats screen won’t tell you this, but your K/D ratio will show the difference.
The Red Zone Isn’t Actually Random
That ear-splitting bombardment zone everyone assumes drops by pure chance? It’s actually hunting you down. The red zone follows a deliberate pattern that most players have never figured out.
Here’s the truth: the red zone algorithm prioritizes areas with high player concentration. When multiple squads cluster in popular loot zones like Pochinki or Military Base, the system identifies those hotspots and dramatically increases the probability of a red zone appearing overhead. It’s not just rolling dice on map coordinates.
The mechanic works as an organic crowd-control system, forcing players to either risk the bombardment or rotate out of contested areas. This explains why you’ll rarely see red zones hammering empty farmland in the late game, but they’ll consistently pound down on that four-squad standoff near the school.
Smart players exploit this knowledge for positioning advantages. If you’re rotating through a town and hear multiple firefights breaking out, expect incoming artillery within 60-90 seconds. You can use this window to either push aggressively while opponents are distracted or skirt around the chaos entirely.
The density threshold appears to trigger around 8-12 players within a 300-meter radius, though PUBG Corp has never released official numbers. Watch the kill feed and listen for gunfire intensity. More action equals higher red zone probability in that sector.
Stop treating bombardment as random bad luck. It’s a predictable mechanic that rewards awareness and punishes clustering.
These mechanics exist in plain sight, yet the vast majority of players never learn them. The gap between knowing and not knowing these systems is the difference between spectating and winning. You don’t need to master all twelve at once—that’s overwhelming and counterproductive.
Pick three or four that match your playstyle. If you’re a sniper main, drill zeroing distance and sound positioning until they’re second nature. Aggressive CQB player? Focus on soft aim, grenade cooking, and movement economy. Vehicle rotator? Fuel mechanics and terrain awareness will keep you alive.
The beauty of these hidden mechanics is that they stack. Master bullet penetration and you’ll win fights other players can’t even take. Add proper zeroing and you’re eliminating targets at ranges most players can’t touch. Layer in sound awareness and movement optimization, and you’re operating at a level that feels like cheating—but it’s just game knowledge.
Jump into a match right now and commit to practicing one mechanic. Just one. Cook your first grenade. Adjust your zeroing before that long shot. Vault instead of jumping. Small improvements compound into massive advantages. Drop a comment below—which mechanic surprised you most? Which one are you trying first? Your next chicken dinner is waiting.